A mini excavator is only as useful as the tool you put on the end of its arm. Because of that, buying the wrong attachment can feel like buying the wrong machine. You spend money, but the job still takes too long.
This checklist will help you choose mini excavator attachments that match your work. It is for homeowners doing land and yard projects, and also for pros who want a clean, practical setup.
We will cover fitment basics, must-have attachments, and a simple brush cutter checklist, so you can buy with confidence and avoid costly mistakes.
Quick checklist first (read this before you buy anything)
Before you look at buckets, thumbs, or a mini excavator brush cutter, confirm these basics. Otherwise, the attachment might not fit, or it may work poorly.
- Your mini excavator size and model
Write down the model name and machine weight class. This helps you avoid attachments that are too heavy. - Pin size
Measure the pin diameter. If the pin is wrong, the attachment will not mount. - Pin spacing (pin center distance)
Measure the distance between the two pin centers. This is a common mismatch. - Ear width (mount width)
Measure the inside width where the attachment sits. If it is too narrow or too wide, it will not line up. - Coupler type
Check if you use pin-on (direct pins) or a quick coupler. Attachments must match. - Auxiliary hydraulics
If the attachment needs hydraulics, confirm your machine has auxiliary lines and the right connectors. - Hydraulic flow and pressure
This matters for powered tools like a brush cutter or auger. Too little flow means weak performance. - Lift and balance limits
A heavy attachment changes stability. So, match attachment weight to your mini excavator capacity.
If you do not know these measurements yet, take 10 minutes and measure them first. It saves hours later.
Mini excavator vs compact excavator attachments (what people mix up)
People often say “compact excavator attachments” and “mini excavator attachments” like they are the same thing. They are similar, but size and weight can change everything.
What “compact excavator attachments” usually means
In many listings, “compact excavator” can include both small minis and larger compact machines. Because of that, the attachments in this category may be:
- wider,
- heavier,
- built for higher hydraulic power.
So, a compact excavator attachment can be too heavy or too strong for a smaller mini excavator. If you force it, you can lose control, strain the machine, or get poor results.
What stays the same across sizes
Even when machines are different sizes, the rules stay the same:
- fitment measurements must match (pins, spacing, width)
- coupler type must match
- hydraulic needs must match
- attachment weight must match what the machine can handle safely
So, always confirm fitment and hydraulic requirements first. Then choose the tool.
Attachment fitment basics (simple, no guessing)
Most attachment problems happen for one reason: the attachment does not match the mount and hydraulics of the mini excavator. So, confirm these basics before you buy.
Pins, ears, and measurements you must confirm
These four measurements decide if an attachment fits:
- Pin diameter: measure the pin thickness
- Pin center distance: measure from the center of one pin to the center of the other
- Ear width: measure the inside width of the attachment mount
- Attachment weight: compare it with what your machine can safely handle
Also, check bucket width. A very wide bucket can feel nice at first. However, it can be harder to control in tight areas. So, match bucket width to your common work.
Quick coupler vs pin-on
Pin-on
- Uses pins directly
- It is simple and often cheaper
- It is fine if you do not swap attachments often
Quick coupler
- Lets you switch tools faster
- It saves time when you use multiple attachments in one day
- It can also reduce pin wrestling, which is good for your hands and patience
If you change tools a lot, a quick coupler is worth it. If you rarely switch, pin-on can be enough.
Hydraulic vs non-hydraulic attachments
Some attachments are simple and do not need power. Others need hydraulic flow to work.
Non-hydraulic examples
- digging buckets
- grading buckets
- rakes
- manual thumbs
Hydraulic examples
- mini excavator brush cutter
- auger
- breaker hammer
- hydraulic thumb
- compactor
For hydraulic tools, confirm:
- your machine has auxiliary lines
- your connectors match
- hoses are routed safely and protected
If hoses rub or get pinched, they wear out fast. That is a small issue that turns into a big headache.
The “must-have” mini excavator attachments (by job)
A good attachment set depends on your work. So, here are the most useful tools, grouped by job type.
Digging and trenching
- Digging bucket: your main bucket for general digging
- Trenching bucket: narrower bucket for clean trenches
- Grading bucket: wider bucket for smoothing and light grading
If you do driveway edges or simple leveling, this one helps a lot.
Landscaping and cleanup
- Rake bucket or root rake: great for pulling roots, rocks, and debris
- Thumb (manual or hydraulic): helps grab logs, rocks, and chunks of concrete
If you do cleanup work, a thumb feels like you added an extra hand.
Drilling holes and posts
- Auger with bits: useful for fence posts, planting, and small footings
Match bit size to your work. Also, make sure your hydraulics can run it well.
Compaction
- Plate compactor: good for trench backfill and small pads
If you do this work often, buying can make sense. If you do it rarely, renting is smarter.
Mini excavator brush cutter (land clearing checklist)
A mini excavator brush cutter is one of the best tools for clearing overgrowth without picking up a chainsaw all day. It works well for weeds, tall grass, and light brush. However, it is not meant for thick tree trunks or big stumps.
What a brush cutter is best for
- Tall grass and heavy weeds
- Brush and small saplings
- Clearing fence lines and field edges
- Cleanup after storms, when small growth is everywhere
Where it struggles:
- Thick stumps
- Large tree cutting
- Deep root removal
Brush cutter buying checklist
Before you buy, check these items so the tool fits and performs well.
- Cutting width
Wider cuts clear faster. However, they can feel heavier and harder to control on a small machine. - Hydraulic flow needs
A brush cutter needs enough flow to keep spinning under load. If flow is too low, it will bog down and waste time. - Hydraulic pressure and connectors
Make sure your auxiliary hydraulics match what the attachment needs. Also, confirm the couplers match your machine. - Deck strength and build quality
A stronger deck handles bumps, sticks, and rough ground better. - Blade type and replacement parts
Check what blade style it uses and how easy it is to replace. - Guarding and hose protection
Flying debris is real. So, look for good guarding and safe hose routing. - Attachment weight and balance
A too-heavy brush cutter can make the machine feel unstable. So, match tool weight to your mini excavator size.
Safety notes for brush cutting
- Keep people and pets far away from the work area
- Wear eye protection and proper boots
- Move slowly near rocks and hidden stumps
- Stop and check blades if you hit something hard
A brush cutter saves time, but only when you run it safely and with the right machine match.
Attachments you should rent first (for most homeowners)
Some tools are great, but you may only use them once a year. So, renting first can save money and storage space.
- Breaker hammer
Useful for concrete and hard rock. However, it is expensive and heavy, so rent it unless you use it often. - Stump grinder
Great for stump cleanup, but most homeowners do not need it many times. - Trencher attachment
Helpful for long utility lines. Still, it depends on soil and project frequency, so renting first is often smarter. - Other specialty attachments
If you cannot name the next job you will use it for, rent it first.
Homeowner setup vs pro setup (what to buy first)
The best setup depends on how often you use the machine. A homeowner usually needs a small set that covers common jobs. A pro needs tools that save time and open up more job types.
Homeowner starter kit (most common needs)
A simple homeowner kit usually covers 80% of home projects:
- Digging bucket (general digging)
- Trenching bucket (drains, water lines, small footings)
- Grading bucket (leveling soil, cleanup, smoothing)
- Thumb (moving logs, rocks, and debris)
Optional adds, only if you will use them a lot:
- Auger for fence posts and planting
- Mini excavator brush cutter for overgrowth and field edges
This setup stays practical and easy to store. Also, it keeps costs under control.
Pro kit (faster work and more job types)
Pros usually switch tools more often. Because of that, speed and flexibility matter.
A strong pro kit:
- Quick coupler (faster swaps)
- Multiple buckets (digging, trenching, grading)
- Hydraulic thumb or grapple (faster grabbing and cleanup)
- Auger (posts, footings, signs)
- Brush cutter (land clearing)
- Compactor (backfill and pads)
This kit helps you finish jobs faster, so you can book more work.
Buy or rent table (simple)
| Job type | Best attachment | Buy or rent? |
| General digging | Digging bucket | Buy |
| Trenches | Trenching bucket | Buy |
| Leveling and cleanup | Grading bucket | Buy |
| Logs and debris | Thumb | Buy |
| Fence posts | Auger | Depends on use |
| Land clearing | Brush cutter | Depends on use |
| Concrete breaking | Breaker hammer | Rent first |
| Stumps | Stump grinder | Rent first |
| Backfill compaction | Plate compactor | Depends on use |
Buying mistakes that cost the most (and how to avoid them)
These mistakes can waste money fast. So, check this list before you place an order.
- Wrong pin size or pin spacing
Always measure. Do not guess. One small mismatch can stop the attachment from fitting. - Ignoring hydraulic needs
Powered attachments need enough flow and pressure. If your mini excavator cannot supply it, the tool will feel weak. - Buying an attachment that is too heavy
Heavy tools can reduce stability and lift capacity. So, match attachment weight to your machine size. - No hose protection
Hoses can rub, pinch, or get hit by debris. Add protection and route hoses safely. - Choosing the wrong width
Very wide tools can be harder to control. Very narrow tools can slow you down. Pick what fits your job sites. - Not planning storage and transport
Attachments need a safe place to sit. Also, consider how you will load and move them.
If you avoid these mistakes, your mini excavator feels stronger, your work feels smoother, and you save money over time.
Care and storage (keep attachments working longer)
Attachments last longer when you do small checks often. This also helps you spot problems early, before a hose bursts or a pin gets stuck.
- Clean after use
Remove mud and debris, especially around pins, ears, and moving joints. Dirt packed in these areas causes faster wear. - Grease the right points
Many attachments and couplers have grease points. Grease them on a regular schedule. This reduces pin wear and helps parts move smoothly. - Check pins and bushings
Look for play, uneven wear, or bent pins. If something feels loose, fix it early. - Inspect hydraulic hoses and fittings
Check for cracks, leaks, rubbing marks, and loose connectors. Replace worn hoses before they fail. - Brush cutter checks
If you use a mini excavator brush cutter:- check blades for chips and bends
- tighten hardware if needed
- clear wrapped grass and wire often
This keeps cutting smooth and reduces vibration.
- Rust protection
If you store attachments outside, use covers and keep them off wet ground. A simple pallet or blocks can help. - Safe storage
Store attachments on flat ground where they will not tip. Keep the quick coupler area clean so the next hookup is easy.
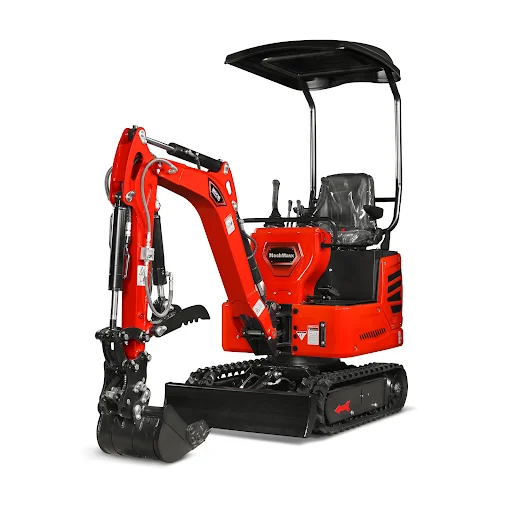
Where to shop MechMaxx mini excavators and attachments
If you want to compare options in one place, MechMaxx has separate sections for mini excavators and related equipment.
You can browse the MechMaxx mini compact excavator series and the MechMaxx mini excavator collection to compare machines and attachments by category.
If you want to explore other equipment too, you can start from the MechMaxx home page and use the menu to find the exact attachment type you need.
This checklist will help you buy the right attachment the first time, so your mini excavator stays useful for both small home jobs and serious work sites.
FAQ
What attachments fit a mini excavator?
Most attachments can fit, but only when the mount matches your machine. So, always check:
- pin diameter
- pin center distance
- ear width
- coupler type (pin-on or quick coupler)
If these do not match, the attachment will not fit right.
Do I need auxiliary hydraulics for a mini excavator brush cutter?
Yes. A brush cutter needs auxiliary hydraulic lines to run. Also, you should confirm your machine has enough hydraulic flow and the right connectors. Otherwise, the cutter may spin weak and feel slow.
Should I buy a quick coupler?
Buy a quick coupler if you switch attachments often. For example, if you dig, grade, and grab debris in the same day, a quick coupler saves time. However, if you rarely change tools, pin-on can be fine.
How do I measure pin size and spacing?
Use a tape measure or caliper.
- Pin diameter: measure the thickness of the pin
- Pin spacing: measure from the center of one pin to the center of the other
- Ear width: measure the inside width where the attachment sits
Also, measure twice. It is boring, but it saves money.
What is the best first attachment after a bucket?
For most people, the next best tool is a thumb. It helps you pick up logs, rocks, and messy debris. After that, choose based on your work:
- trenches often: trenching bucket
- leveling often: grading bucket
- fence posts often: auger
- land clearing often: brush cutter
Quick checklist to use before you buy
Use this short list every time you shop for attachments:
- I know my pin diameter, pin spacing, and ear width
- I know my coupler type
- I checked attachment weight vs my machine size
- If it is hydraulic, I checked aux lines, connectors, and flow needs
- I picked the right width for my job sites
- I planned where I will store the attachment
If you follow this checklist, you avoid most bad buys, and your mini excavator feels useful on day one, not “later when I figure it out.”
Conclusion
Mini excavator attachments can make your machine feel like five machines in one. However, the best results come from choosing tools that match your real jobs, not just what looks cool online.
Start with fitment first. Measure your pins, spacing, and mount width. Then check the coupler type, attachment weight, and hydraulics. After that, build your kit in a smart order. Buckets cover digging and grading. A thumb helps with cleanup. Then add an auger or a mini excavator brush cutter only if you will use it often.
If you follow the checklist in this guide, you will buy the right attachments the first time, work faster, and avoid expensive mistakes.