
Running a small business or freelancing often means juggling clients and paperwork. Every time you complete a project or sale, you need to send an invoice — a formal payment request that specifies your services or products and their costs. Many people do this using Word or Excel templates, but that can be tedious and error-prone. An invoice generator simplifies the task by automating invoice creation: it formats the invoice, does the math, and produces a ready-to-send PDF in seconds.
What is an Invoice Generator?
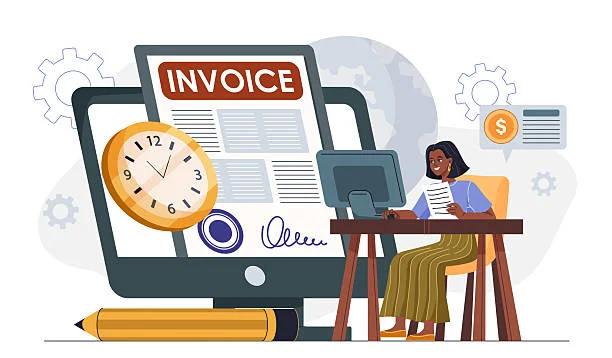
An invoice generator is an online or software tool that creates professional invoices from your input. You provide your business details (name, address, logo, etc.), your client’s information, and a list of products or services with prices. The generator automatically formats the invoice, adds dates and numbers, calculates taxes and totals, and produces a polished invoice document (usually PDF). This eliminates the need to manually draft every invoice in Word or Excel.
Invoice generators come in many forms. Some are free web apps that require no account, while others are part of paid accounting software or mobile apps. Many offer a variety of invoice templates or customizable designs, letting you include your logo and branding. Regardless of the form, the goal is the same: turn your billing details into a professional invoice in a few clicks.
Benefits of Using an Invoice Generator
For busy freelancers, small business owners, and accountants, using an invoice generator offers significant benefits:
- Time Savings and Efficiency: An invoice generator greatly reduces manual work. After entering your business and client info once, the system can automatically fill these details in future invoices. You can reuse previous invoice items, and the tool handles all calculations instantly. This means creating each new invoice takes only a minute or two instead of many.
- Professional Appearance: Generated invoices come out looking polished and consistent. You can include your logo, choose fonts, and match your company colors. A professional-looking invoice builds trust with clients and shows you’re an organized business. Clients are more likely to pay promptly when they receive a clear, well-formatted invoice.
- Accuracy and Fewer Errors: The tool automatically calculates subtotals, taxes, and discounts so you don’t have to do any math. This greatly cuts down on mistakes like missed fees or incorrect totals. It also auto-numbers invoices sequentially to avoid duplicates. The result is fewer billing errors and more confidence that each invoice is correct.
- Better Cash Flow and Tracking: Many invoice generators let you track which invoices are paid or overdue. Some send automated payment reminders when a due date passes. By having a clear overview of outstanding invoices, you can follow up quickly and keep cash flowing. In addition, some tools let clients pay online directly from the invoice, which often speeds up payment.
- Organized Records and Security: With invoices stored digitally, you save space and avoid lost paperwork. The tool keeps an archive of all your invoices that you can search or sort by date, client, or status. Good invoicing tools use secure cloud storage and backups, so your data is protected and easy to retrieve. This organization makes tax time and accounting much simpler.
How to Use an Invoice Generator
Most invoice generators follow a similar workflow. Here’s how you typically create an invoice:
- Enter your business details: Provide your company name, address, and contact info. Upload your logo if possible. Once set, this information automatically appears on every invoice.
- Add client information: Input the customer’s name, address, and email. Invoice generators usually save clients, so you can select the customer from a list instead of retyping.
- Set invoice number and dates: The tool will auto-number invoices sequentially, but you can adjust it if needed. Enter the invoice date (today’s date) and a due date (for example, “Net 30” means 30 days to pay).
- List your items: Add each product or service as a line item with a description, quantity, and price. The invoice generator calculates each line total and subtotals automatically.
- Add taxes, discounts, or terms: If you charge tax, enter the tax rate and the tool will include it in the total. You can also specify any early-payment discount or late fee, and note accepted payment methods as terms.
- Review and finalize: Preview the invoice to ensure all details are correct—names, items, math, and formatting. If needed, make edits.
- Send the invoice: Download the finished invoice as a PDF or send it directly to the client by email using the tool. The invoice is now sent and ready for payment.
Once you’ve done this a few times, generating invoices becomes a quick routine. The generator does the heavy lifting with layout and calculations, so you just supply the data.
Common Features of Invoice Generators
Most invoice generators include several useful features to streamline billing:
- Customizable Templates: Choose or design invoice layouts with your logo, company colors, and fonts. This branding makes invoices look professional and consistent. Templates ensure all invoices include necessary fields (like item descriptions, totals, and payment terms).
- Client and Item Databases: Save customer details and common product/service items. Once saved, selecting a client or item from a list auto-fills most details, avoiding retyping. This speeds up repeating invoices and keeps data uniform.
- Automatic Calculations: The tool adds up line-item totals, applies taxes (or discounts), and gives you the final balance. You can usually set tax rates or currencies for international clients. Because it does the math, invoices are accurate and ready to send.
- Recurring Invoices: For ongoing services or repeat jobs, set up recurring invoices on a schedule (like weekly or monthly). The generator will auto-create and send each invoice at the specified interval without manual effort each time.
- Automated Reminders: Many invoicing tools can automatically send follow-up reminders for overdue payments. You can customize the message and timing. This helps improve cash flow without manual tracking.
- Online Payment Integration: Some invoice generators let you add a “Pay Now” button linked to payment options (credit card, PayPal, etc.). Clients can click and pay instantly from the invoice, making it easier for them and faster for you.
- Mobile and Cloud Access: Many invoice generators are cloud-based and accessible from any device. Some have mobile apps, so you can create and send invoices directly from your phone or tablet. This is especially helpful for contractors or freelancers who need to invoice on the go.
- Invoice Tracking and Notifications: You can see at a glance which invoices have been paid or are still outstanding. Some tools even notify you when a client views the invoice. This visibility helps you know when to follow up.
Best Practices for Using an Invoice Generator
For best results, follow these practices when using an invoice generator:
- Include All Required Information: Make sure each invoice shows your business name and address, the client’s details, an invoice number, invoice date, and a due date. The template usually has fields for all of this; don’t leave any blank.
- Be Clear and Consistent: List each product or service on its own line with a clear description, quantity, and price. Use the same style and numbering on every invoice. Consistency makes your records neat and avoids confusion.
- Set and Communicate Payment Terms: Clearly state your payment terms (for example, “Net 30 days” or accepted payment methods). Note any late fees or discounts. Clear terms help clients understand when and how to pay you.
- Double-Check Before Sending: Always preview the invoice to catch errors. Verify names, amounts, and calculations. Also save a copy (PDF or printout) for your records. Double-checking ensures professionalism and accurate record-keeping.
- Follow Up Promptly: If a payment is late, send a polite reminder email or message. Many generators automate this, but a brief personal note can help too. Prompt follow-up encourages timely payments and shows you’re attentive to your billing.
- Maintain a Professional Tone: Use polite, businesslike language in your invoice messages. Thank the client for their business and clearly state the amount due and due date. Professional communication helps maintain good relationships and encourages prompt payment.
Conclusion
An invoice generator is a valuable tool for freelancers, small businesses, and accountants who want to handle billing efficiently. By automating invoice creation and calculations, it saves time, reduces errors, and ensures every invoice looks professional. Features like customizable templates, automated math, client databases, and payment tracking make the billing process more reliable.
When using an invoice generator, remember to include all necessary details, proofread each invoice, and follow up on late payments. These best practices help you get the most benefit from the tool.